Scheduling a 1-2-1 Event
- How-to Guide
- Logging On
- Your Dashboard
- Scheduling a Group Event
- Scheduling a 1-2-1 Event
- Editing an Existing Event
- Hosting a Group Chat Event
- Hosting a 1-2-1 Chat Event
- Sharing Media in an Event
- Live Streaming with OBS
- Data and Content After the Event
- Editing Content
- Media
- Custom Email Templates
- Managing Users
- Network Connectivity
Scheduling a 1-2-1 Event
From your dashboard click on ‘Schedule new event’ to arrive at the following screen:
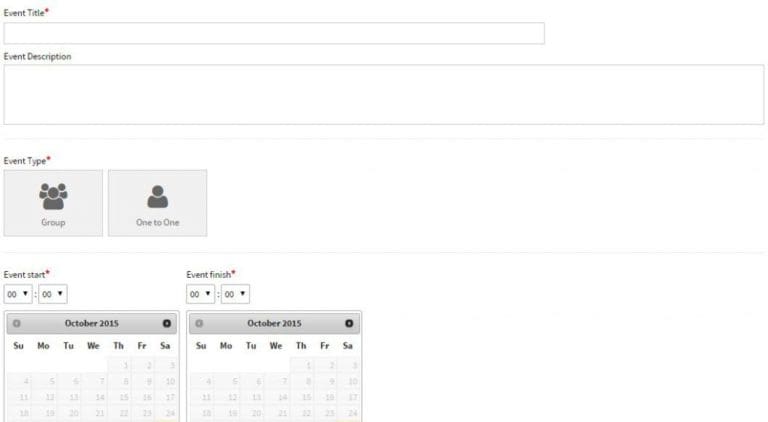
Create your Event Title and Event Description. These are brief descriptions of the event, for example:
| Title | Meet the Grad team | | Description | Chat to our team & find out more |
You have an unlimited character count for both the title and description, but these will be truncated after 27-29 characters (but still readable to the participant clicking ‘read more’ on the list of upcoming events). We advise that you try to keep the title short and snappy, but use a longer description if you need to. The description is also appended to the reminder emails sent to the participant, so you can be as verbose as you need to here.
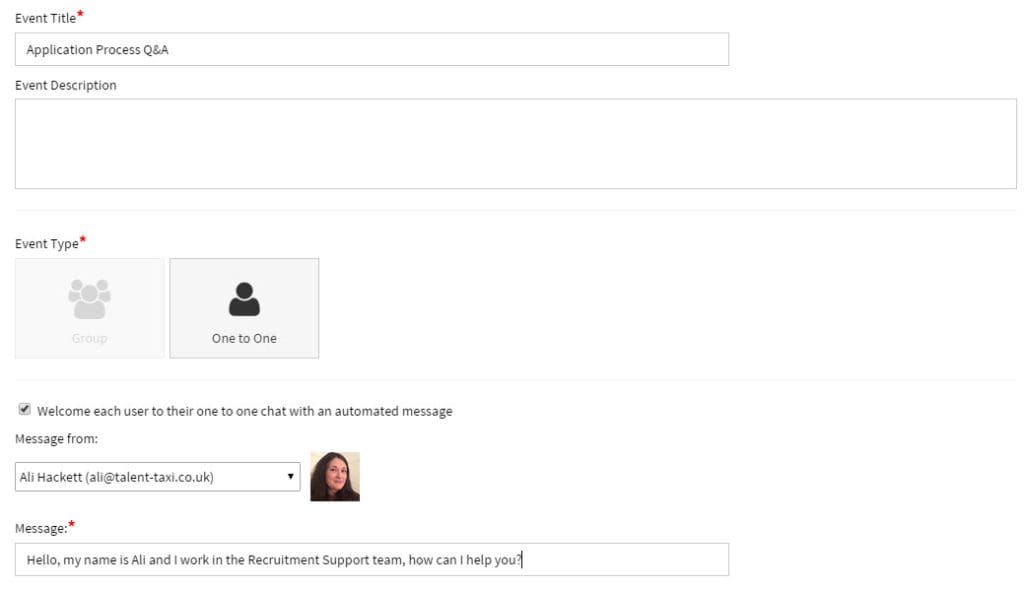
Move down the page and click on One to One. After you have chosen the One to One option, you are asked to define who the welcome message comes from. When a user pops up to chat, this is the introductory message they will see before they type their question. The drop down shows other members of your team as well as you. This is so you can use the function to perhaps include a message from another colleague if desired. (e.g. “Thanks for joining this one to one chat event! Please let me know how we might help today, and one of my team will try to answer to the best of their ability!”)
If you have established any teams (see the Managing Admin Users section), you can restrict moderation access to one of those teams. As well as being a simple way to control access to certain events for other moderators, this also keeps the Live and Planned Events table on the ‘Live Events’ page cleaner). If you have established any teams, the following appears:

If you leave this dropdown set to ‘Everyone’, all moderators on your Control Panel account will have access to the event. If you wish to restrict access only to a certain team, select it from the list.
Select the start and finish time and date for the 121 event. If you know you’ll be at your desk, it’s possible to open your chat across the day and get on with your day job. The system provides a bell-style alert to let you know a candidate has asked a question.
If other colleagues (moderators) are on the platform at the same time, they can also involve themselves in your conversations (see the Hosting a 121 event section).
It is possible to create an event that recurs, opening and closing at the same time, perhaps on a daily basis. Tick the ‘recurring event’ box and choose a recurring interval (shown below). Using the recurring feature in conjunction with the time and date allows you to create a chat event open every week-day between 9am and 5pm, for example.
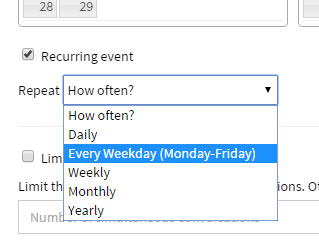
The participant will only see the ‘next’ occurrence of the event when visiting your landing page. If its 17:10 on a Friday, the landing page will report that your 9-5 week-day event is next scheduled for the coming Monday at 9am, as you would expect. The event continues to recur until you remove the event or make it private.
It is also possible to limit the number of simultaneous 121 conversations. Click on the ‘Limit simultaneous conversations’ box and choose a number of conversations to allow at once.
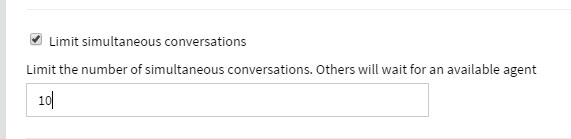
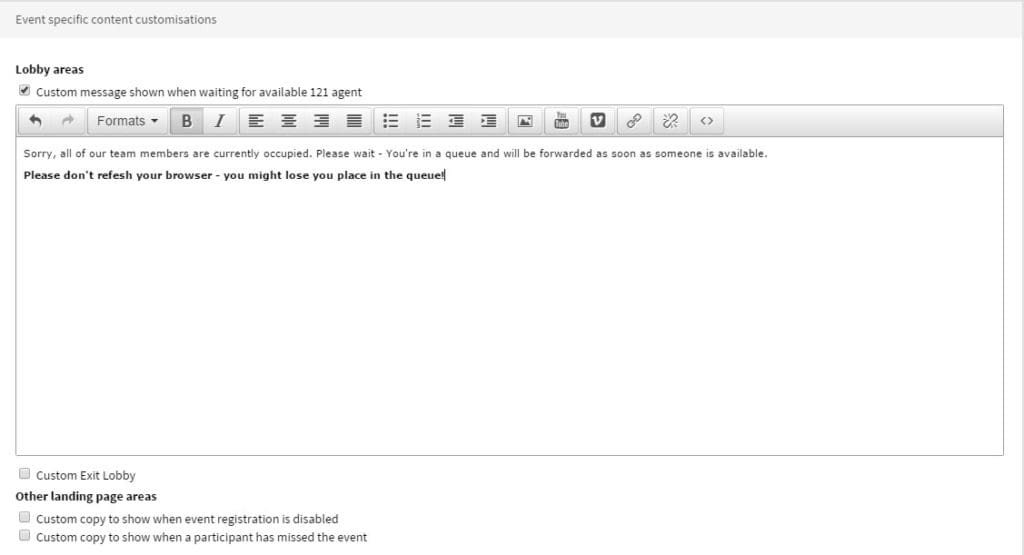
Any participant who clicks ‘join event’ while the maximum limit of conversations is already happening will see a ‘waiting for available 121 agent’ message (editable in the content customisations section below).
Tip: If you set the maximum limit of simultaneous conversations to 0 (zero), all users will see the ‘waiting for available 121 agent’ message. Moderators can manually admit participants beyond the limit you set (see Hosting a 121 event) so this can be used as a handy way to make all participants wait until you have bandwidth to chat to them.
Choose whether people can register for the event (receiving a reminder via email as it begins) or leave open to participants dropping by.
Select the option marked ‘When an event is full, collect user’s email address’ and the user will be prompted to provide their name and email address when attempting to register for a full event. The details collected can be found both before the event begins by clicking on ‘Edit’ from the upcoming events list, or afterwards by clicking on ‘Show’ on a previous event. (see ‘Data and Content after the event‘)
You can edit content associated with this event in the ‘Event specific content customisations’ section. Tick the box next to any of the sections you want to edit and make changes in the editor window that appears. These changes only affect the event you’re creating here, so you can tailor the content with specific information around the chat topic. See the Editing Content section for more information on these.
Choose the participant logon options you prefer. We recommend choosing both ‘allow participants to join with a one-click social login’ as well as ‘Nickname and email address’ to give two options to participants.
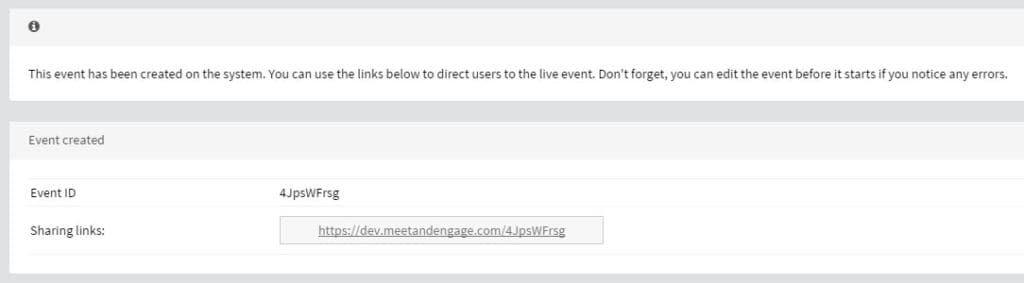
Click ‘Create Event’ at the bottom right of the screen and the event will appear on the landing page. The platform also creates a unique URL per event and you can send this link, or the link to your platform out to participants who are in-process (for instance) and who might have questions about the process.